
Step 2: Creating a Course - Preparing your Course Icon!

Before you create your first course, you will need to create a course icon. This icon needs to be 600 px by 600 px. If you do not have access to an image creating software, you can follow the instructions below:
1] Find and download an image (simple is best). Free images can be found here: http://makerbook.net or http://search.creativecommons.org
2] Click on this PowerPoint slide title to download it to your computer: Course Icon
3] Open the PowerPoint. It will be one slide that looks like the image to the right
Note: Everything you add MUST be on the white part of this slide
4] Insert your image onto this slide. Drag or crop it so it fits onto the white part of the slide. Change the transparency if the image is too dark.
5] Insert text for a title. Use a PLAIN, DARK font, no smaller than size 24 (you only need a title, not your name)
|
6] When you have your design just they way you like it, you will need to save it as an image (only what is on the white which is the right size)
• Using the top menu on PowerPoint, click on Edit > click on Select all • Now put your cursor on the slide and right click (on a mouse) or Control + click which will give you a drop down menu. • Choose Save as Picture (as per image at right) • Save as per below: 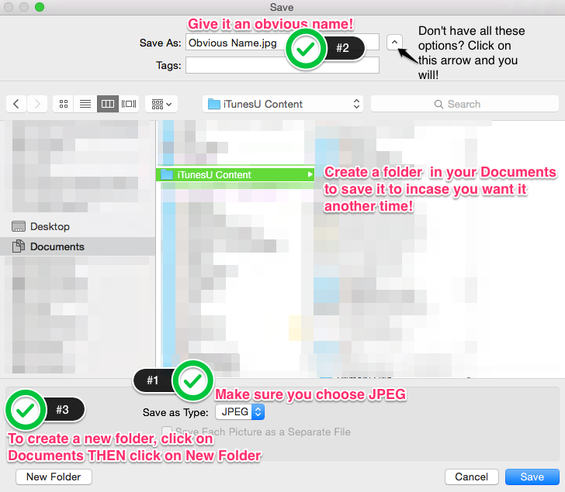
|
|
